
")
Woodworking can be your hobby or source of income; it is essential for you as a woodworker to have your shop. Have you ever planned where to build your workshop? There are different woodwork shed design tutorials and tips available on the internet nowadays. Others discuss garage woodshop design, while others discuss creating a basement shop layout. Allow me to discuss with you how to create a backyard woodworking shop.
Contents
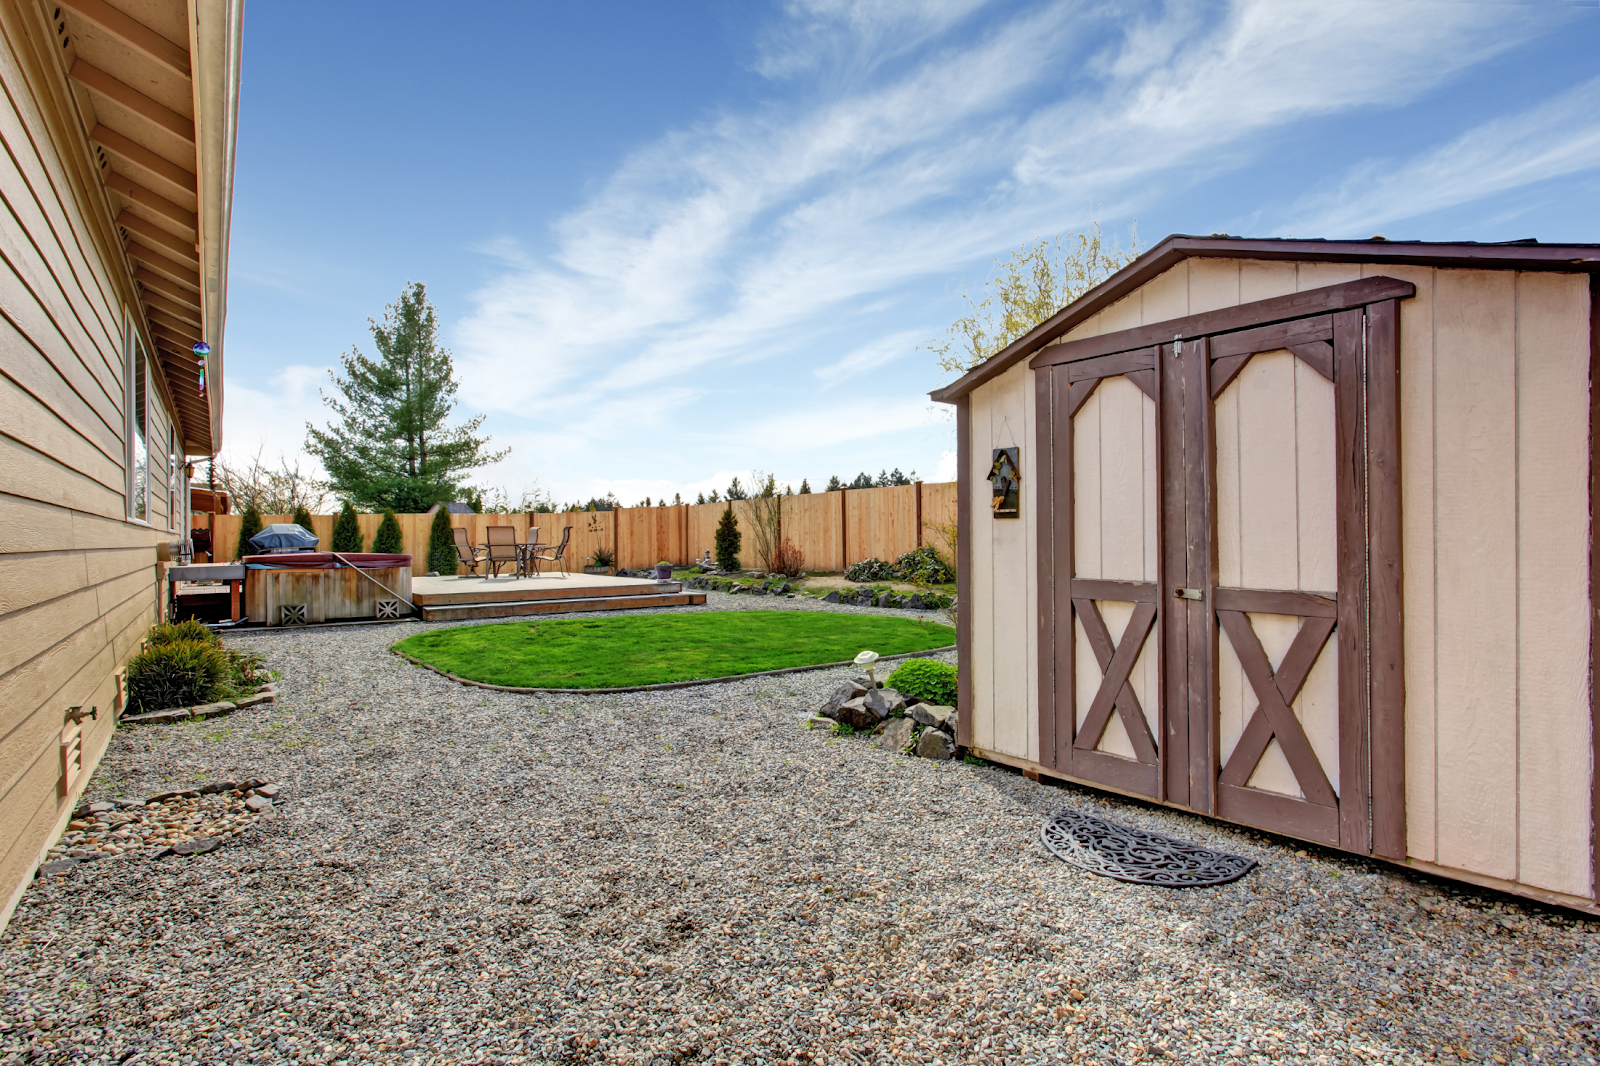
Backyard Woodworking Shop
Is a backyard woodshop common nowadays? Yes, of course. It is one of the typical woodworking shop designs for a woodworker. Building a backyard woodwork workshop will allow you to allocate ample space for your work area and lumber storage. If you decide to create a workshop shed at the back of your house, it will enable you to decide on your shop workspace rather than do a workshop in a garage or the basement.
Most of the car garage and home basement had minimal space. When you decide to build a garage workshop or a basement shop, you need to have a space-saving design idea as you need to plan according to its space. However, if you decide to build a backyard workshop shed, you have more freedom regarding your shop design. Why? When you choose to build a woodworking workshop from the back of your house, you will build a customized dimension from scratch and then build. That is why if you decide to create a backyard woodworking shop shed, you have more freedom of space in your woodworking workshop. As a woodworker, you can decide on how big or small your woodworking shop will be.

There are different designs and styles for a backyard woodworking shop for you to decide. It depends on your woodworking workshop shed for the main purpose. For example, if you plan to build a woodworking shop at the back of your house for your hobby, you may decide to build a small backyard shop like a ranch-style shed. It would be big enough for your woodworking machinery and equipment.
If you plan to use your woodworking shop to create woodworking furnitures for commercial purposes, you might want to build a large shed. It would allow you to accommodate stationary woodworking machines that are essential for woodworking projects. For example, you can create a high-barn-style woodworking shop that will cater to all your woodworking machines and wood storage.
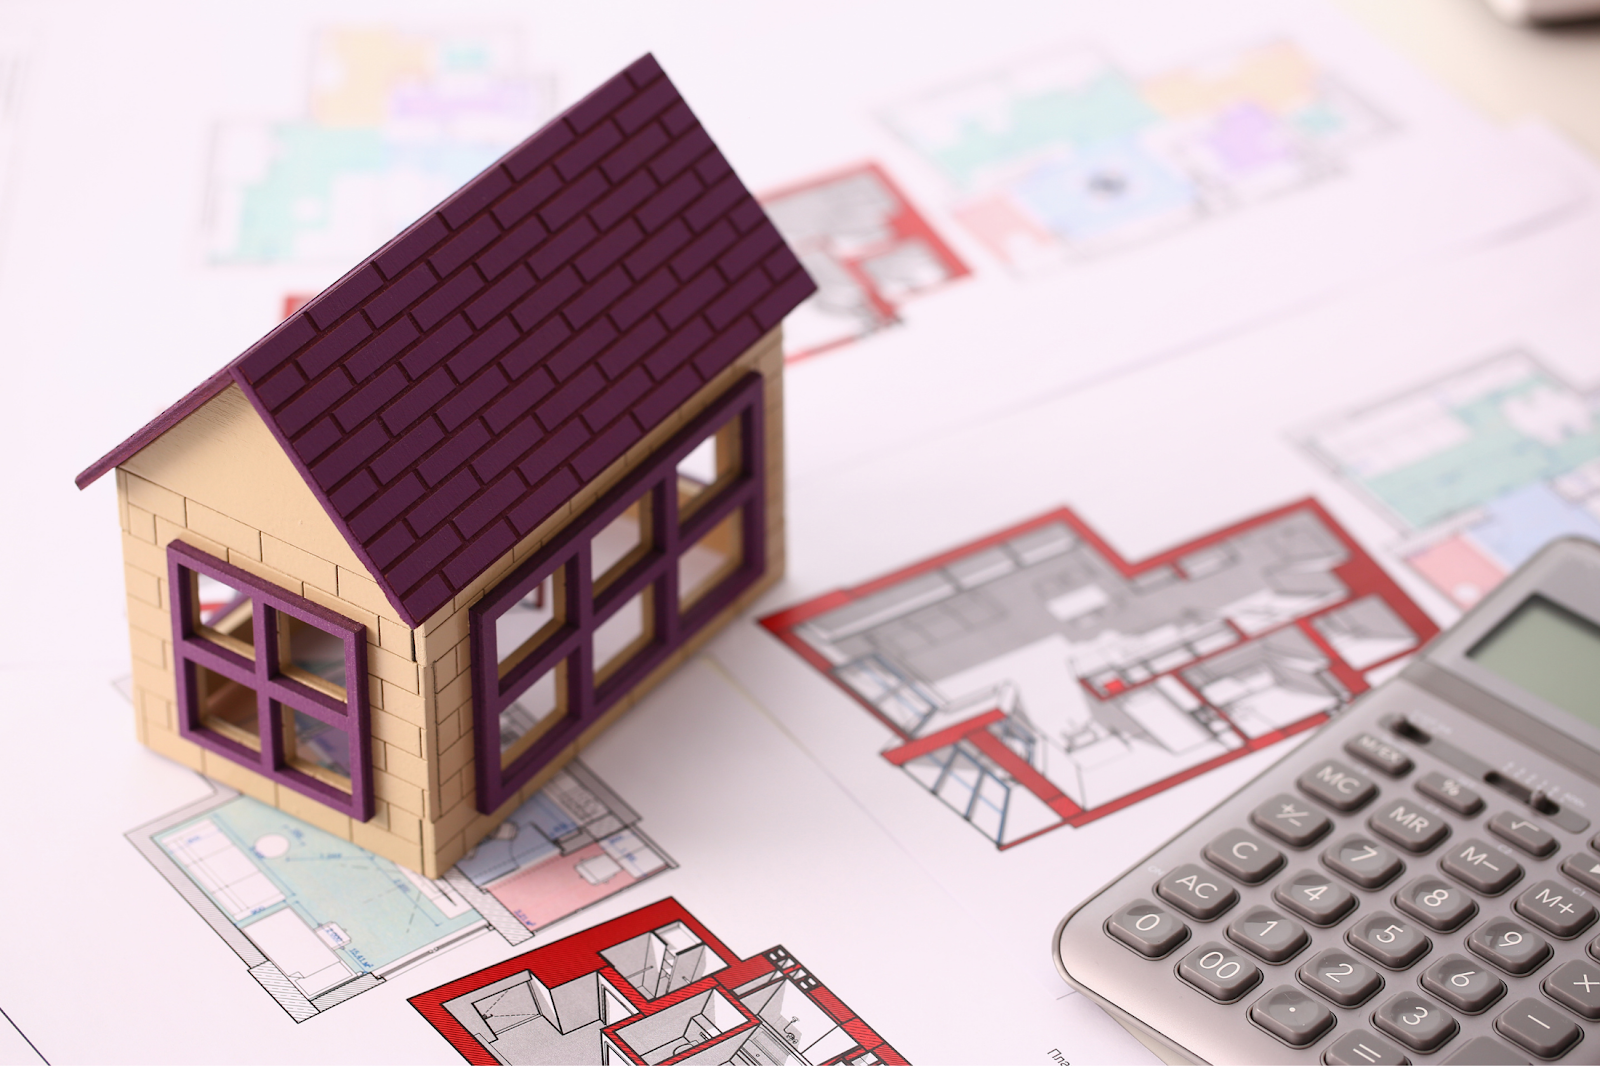
Backyard Woodworking Shop Building Cost
Have you ever think, how much it cost for you to build your workshop? When you decide to create a backyard woodworking shop, it means you need to build from scratch. It means if you choose to create a backyard woodworking shop, it would cost you a dollar. Not a single dollar, but surely it will cost you more than a hundred dollars. That is why building a woodworking workshop shed from the car garage, and the home basement is less expensive than building a backyard woodworking shop.

Well, you may already have a vacant tool shed or a barn house in your yard that can be renovated. Then, it would be good for you as you can save a dollar from starting from scratch. However, if you don’t have a building yet for your planned backyard woodworking workshop, you need to build a new one.
Building a new backyard woodworking shed costs may depend on your shop dimensions and building materials. For example, creating a small woodworking shop made from wood is less expensive than building a large concrete woodworking workshop.
Now the next step you need to do is to compute your woodshop shed building cost.
Woodshop Building Set Up Cost
The professional building cost estimator has estimated that building a woodworking workshop cost is between $6,000 to $120,000. However, it depends on your woodworking workshop materials, shop size, and workshop finish. Your woodworking shop cost calculations will be $30 to $200 per square foot, depending on your shop materials.
20×30 Shop Building Cost
With the estimated price mentioned above, you can calculate your woodworking shop cost. The building cost estimator estimated that a square foot’s price range is between $30 to $200. So if you plan to build a 20×30 woodworking shop and the cost per square foot is $100, your whole woodworking shop will cost you more than $60,000.
Allow me to discuss the top 3 woodworking shop building materials you might want to use in your workshop. Along with the building materials will be building cost estimated price range calculations. Here is the step by step guide on how to compute your shed building cost range.
Wood Building Materials For 20×30 Woodworking Shop

Building a backyard woodworking shop with wood has a lot of advantages. Since wood is the less expensive building materials compare to metal and concrete materials, it will help you save your hard-earned money. The estimated price range of a hardwood per square foot is between $3 to $13, depending on its hardwood capacity. The highest the wood quality, the more expensive it is but, the more durable.
Not let’s do the calculation. You will use high-end engineered wood, and its cost per square foot is $13. Your woodworking shed building cost will be from $7,800 to $ 12,000.
Metal Building Materials For 20×30 Woodworking Shop

Metal building materials are more expensive when compare to wood building materials. An estimated cost for a metal per square foot is between $10 to $30. So if you decide to create a backyard woodworking shop from metal kits, it cost you more dollar than the wood materials.
Let us say that the metal kits cost per square foot is $25, so a one 20×30 woodworking workshop shed would cost $15,000 to $20,000.
Concrete Building Materials For 20×30 workshop
Concrete building materials are the most expensive among the three materials that we discussed. So, if you decide to build a backyard woodworking shop made from bricks, you need to prepare enough money. The home advisor estimates that a brick workshop’s construction cost $50 t0 $150 per square foot.
A one 20×30 foot woodworking workshop built from a costume brick construction will cost $30,000 to $90,000.

Every woodworking building material has its advantages and disadvantages. It is up to you to decide which one of the building materials discussed above is cost-efficient for you to use in your workshop building. Just make sure to consider every factor you need for your workshop planning.
Now, let us assume that you had decided on what building materials you will use to create a backyard woodworking shop. And then, you already had your woodworking workshop building design.
What’s Next To Do? Now the next step you need to do is building your woodshop shed.
How do I start building a backyard woodworking shop?
The first step you need to do to build your dreamed woodworking workshop is to check out your city building code and city ordinance regulations. Your government officials might request you to have a building permit for your woodworking shop. Make sure to secure all the paper works you might need before building your woodworking workshop.

The second step you need to do is to secure a detailed woodworking shop design. You can draw a layout plan on your own, or you can ask a professional to make one for you. Make sure to input detailed measurements for your woodworking workshop design.
Now the next step you need to do is building your woodshop design. Read the step by step guide here.
Woodshop Building Floor Plan
Then, according to your detailed building design, start laying out your floor plan. It is recommended to have a concrete floor that digs at about 8 inches. Make sure to have a good wire mesh and rebar to reinforce your floor design.

Woodshop Building Wall Installation
Next to your floor design is your wall, depending on your decided building materials. If you chose to build a woodworking workshop made from wood, then start nailing your wall materials. If you chose to build a workshop made from concrete materials, you should begin laying out your wall foundation. Your woodshop wall foundation plays a crucial part in your whole home woodshop.
Workshop Building Roof Installation
Next to your woodshop shed installation step is your woodshop roof. Start by installing your roof trusses. Once done installing your roof trusses, start installing your woodshop roof. Once done with the roof installation, you can start adding your woodshop door and windows accordingly.

Woodshop Finishing
Next to your roof installation step is the woodshop finishing job, both from the exterior and interior finishing. Exterior finishing might include installing woodshop siding and other finishing touches you might want for your dreamed workshop.
Interior finishing touches include installing your woodshop overall power services like power outlets, electric wiring, lighting fixtures, drywall, insulation, and heating system. Once done with the electrical service, you can now start painting the interior space of your woodshop.
When it comes to your shop lighting, you need to ensure that you had a good light fixture on your woodshop. Why would that be important? Your woodshop lighting ambiance plays a vital role in your woodworking project quality. With proper light fixtures, you can ensure your work project and, at the same time to protect your eyes from health problems.
Other woodworkers placed windows near their work area to strategically invite more natural light on their shop. You can do so! A natural light coming from your woodshop windows will help you save electrical billing.

Now your dreamed woodshop is here! Now the next step you need to do is start your woodshop.
How do I start a woodworking shop?
You finally build your woodshop. Let us begin filing your woodshop first with your woodworking tools, machines, and other essential woodworking.
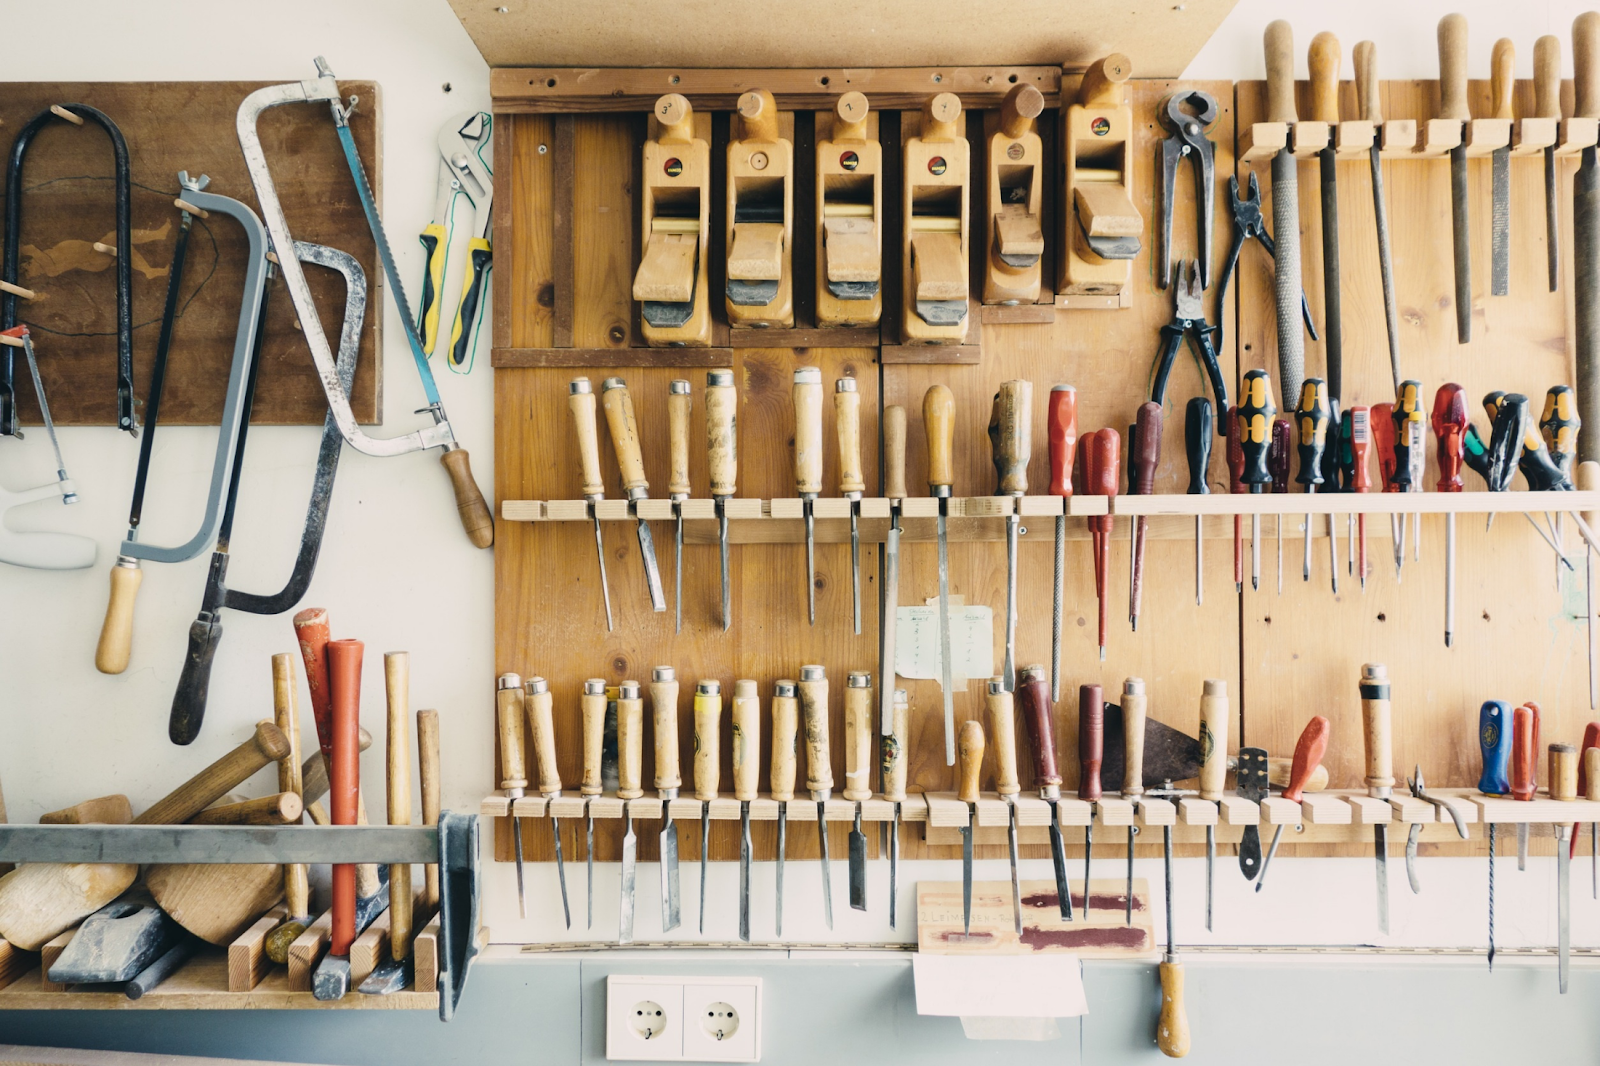
Woodworking Workshop Storage
Let us start with your woodshop storage. It is up to you to decide what kind of storage you will have in your workshop. Add a pegboard and shelving storage cabinets so you can utilize your shop wall space. You can organize your small woodworking hand and small power tools like a cordless drill, chisels, hammers, and many more with your pegboard. While on your wall-mounted storage cabinet, you can organize your woodworking protective gears like ear protectors and basic woodworking tool like hand planes, clamps, drill bits, and saw blades.
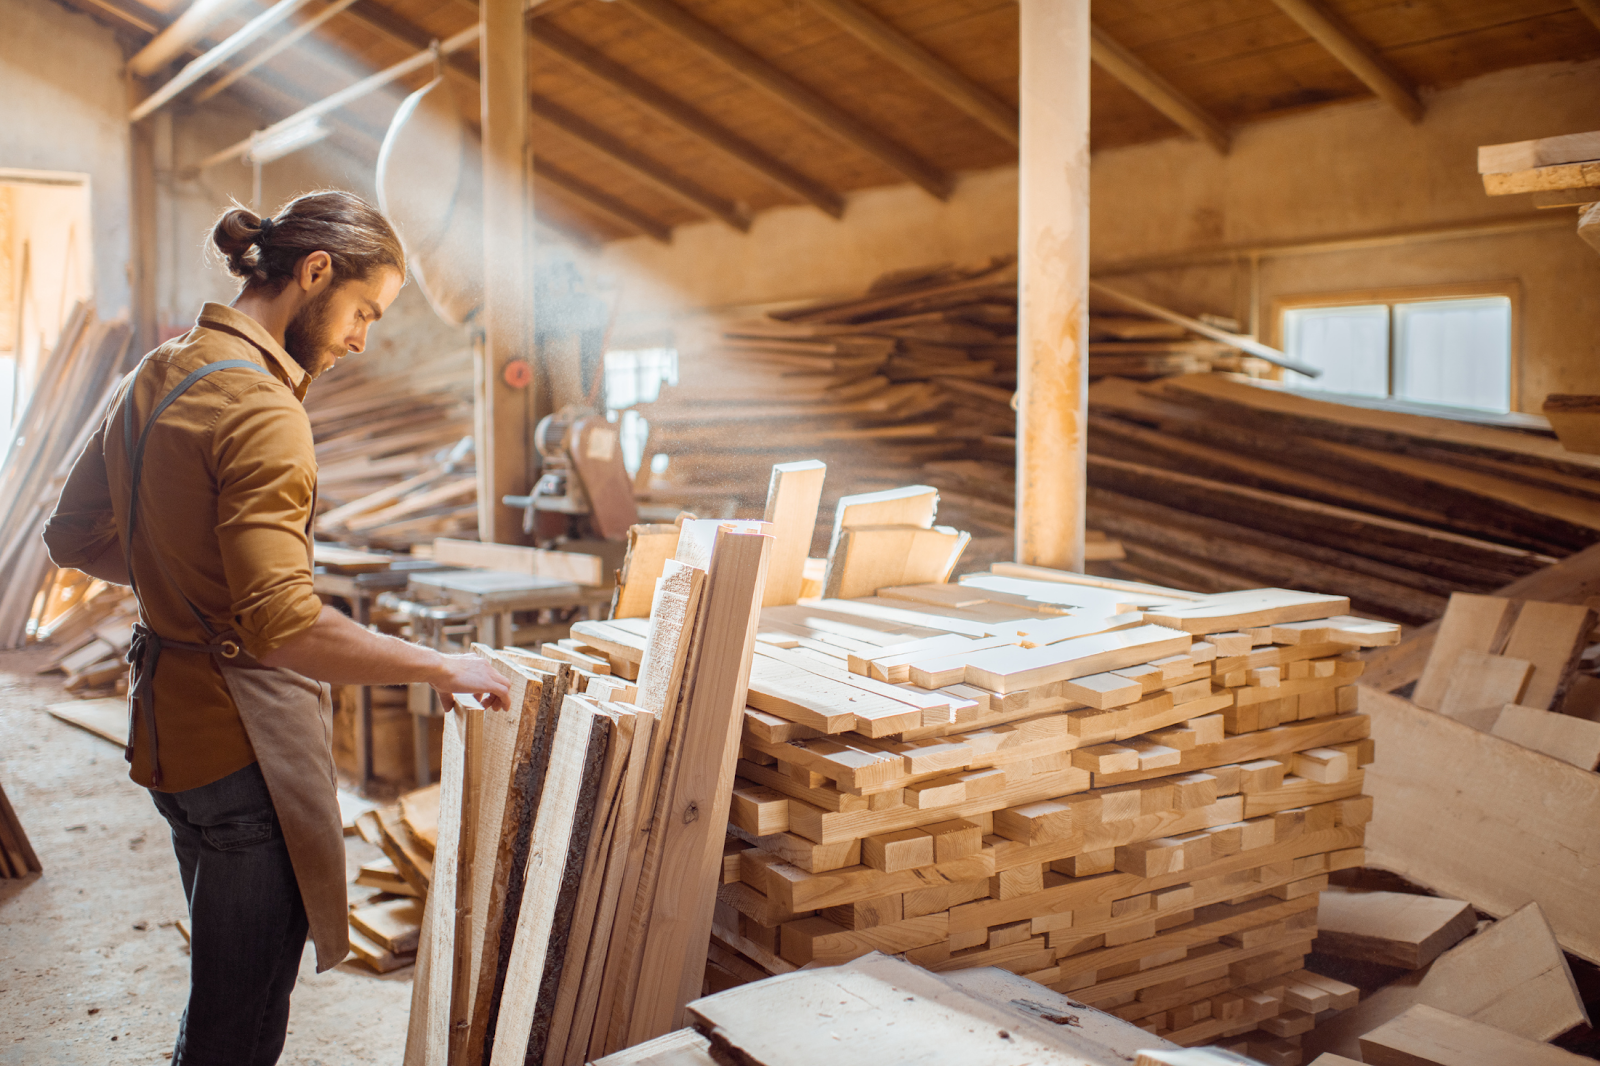
Lumber Storage
Every woodworking shed needs lumber storage. Expert woodworkers often recommend to built lumber storage near woodworking shed projects for some reason. A lumber storage near your woodshop door will allow you to load and unload lumber conveniently.
One factor to consider in making lumber storage is your woodshop shed temperature. Make sure that your storage shed is not damp as it can affect your wood quality. And also, make sure that your storage area has a flat floor to avoid wood defamation.
Dust Collection
Aside from your woodshop tool storage, a dust collection system is an essential machine for your woodshop. Why? Lumber cutting, planing, and sanding are the most common task in woodworking projects that involve wood dust. Without a proper dust collection, your wood dust will easily pile up in your shop. Wood dust pile floating in the air can harm you and your woodworking machines. Yes, wood dust piles and air dust can lead to serious respiratory problems when exposed to a long period. Wood dust pile is one of the most common reasons for fire blast burning woodshop in some areas.

How to prevent such an unwanted situation? Prevent such health hazards and unwanted woodshop problem with the proper dust collection system and regular woodshop cleaning. Your dust collector will prevent air dust from floating all over your woodshop. If you can avoid air dust and dust piles from your shop, you ensure your health safety as well as your whole woodshop.
Now the next step you need to do is organizing your power tools on your shed.
Woodshop Power Tools
Workbench
Your workbench serves as the backbone of your woodshop. It is where almost every woodworking task happens. It would be best if you chose a woodworking workbench where you can work comfortably and efficiently. Where can you place your working bench in your shop? Well, it is up to you. You can place your working bench wherever you want it in your work area.
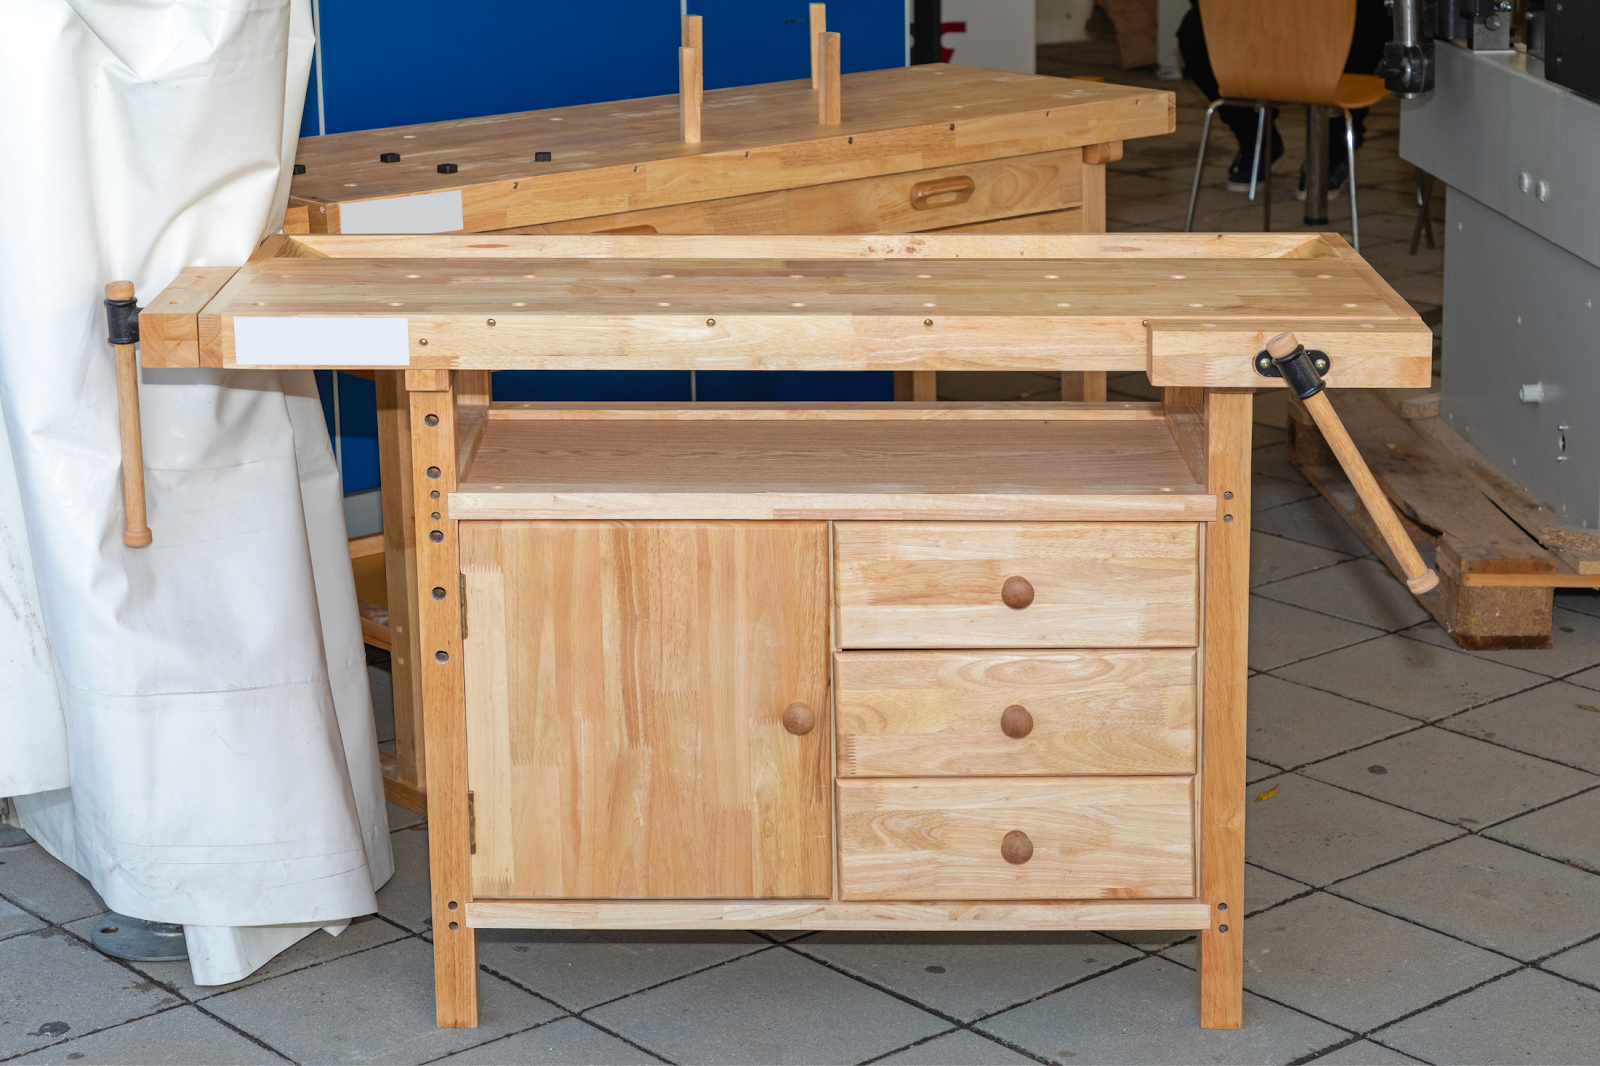
It is recommended for a woodworker to keep their workbench near their woodshop power outlet to easily access it while using their power tools while working in their workbench.
When it comes to your workbench height, it is best to have it with the same height as your other working tables, like your table saw and assembly table. In that way, they can work as a support to each other. Say, for example, when you need to cut long lumber, your workbench can work as a supporting table for your table saw. On the other hand, when you need to assemble long wood boards for your wood projects, your workbench can serve as an extended assembly table.
Make sure that your working workbench is versatile and multipurpose. How to do so? You can add a mounting storage cabinet to make your working bench versatile. You can install it in the center part under your working bench and add a storage drawer on both sides. It will serve as an additional storage organizer for your hand and small power tools.
Table Saw
You may place your table saw anywhere in your woodwork shed, but it would be best to keep it near your working bench and other working tables with an equal height. Why? From time to time, you may cut a long wood board for a designated work project. Then your working bench can work as an extended table for your cutting saw.
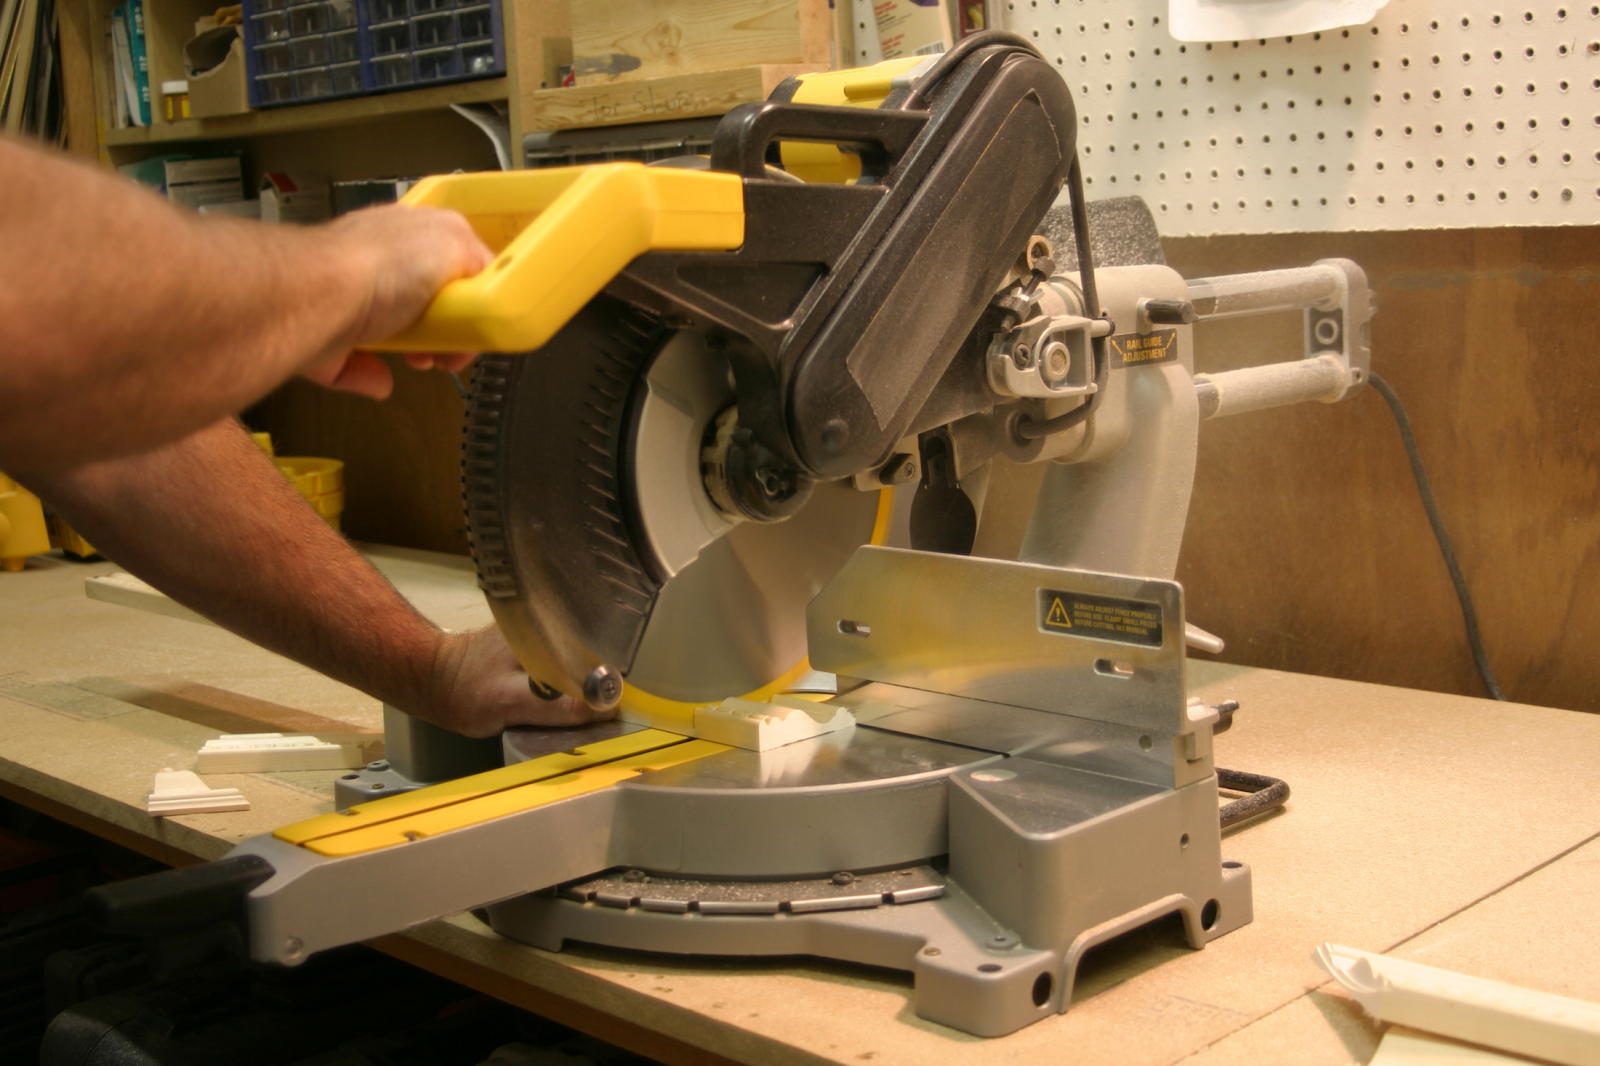
Miter Saw
Just like the other woodshop saw, a miter saw is mainly used for wood cuttings. It is designed for straight and angled crosscutting. It is wise for you to place it near your table saw mounted on your wall near your electrical outlet. You can also make it portable by making it a mobile tool. Install mobile base caster to easily relocate your saw when you need space from time to time.
Circular Saw
There are two options for your circular saw. You can keep this saw as a handheld tool and keep it in your storage area. On the other hand, you can mount it on a portable table for ease of access when you need to cut your wood board.
Drill Press
This tool is used to cut holes or drill holes on your wood board accurately. It can be mounted on a table to make it more accessible and controllable when making holes. You can place your drill press anywhere on your work shed. However, it is best to have it on a mobile base stand so that you can move it easily around your woodshop area when not in use.

The next step in organizing your work shed is your hand tools.
Hand Tools
It would be best if you also had a hand tool in your woodshop. The hand tool is essential for wood carving, detailing, and jointing. They have a lot of advantages over stationary tools as they can use anytime and anywhere. It is lighter, easier, safer, and quieter to use. This woodshop tool is useful in every aspect of a DIYer and woodworker’s life. Most people nowadays have small tools in their home as they are a versatile tool that can use anytime.
Check out the lists here for complete lists of tools you need for woodworking according to its woodworking category.

Woodworking Tools Category
- Fastening
- Wood Clamping
- Carving
- Measuring and Marking
- Wood Chisels
- Sharpening
- Mallets And Hammers
- Hand Drills
- Planes
- Hand Saws
Carving Tools
the carving tools are used to cut and embossed to enhance the woodwork furniture project’s quality and appearance. Carving tool includes gouge, mallet, knife, and chisels. You can keep your small tool on your woodshop shed storage cabinets.
You can organize your carving tool on your storage shelve built on your wall space at home or your woodshop garage.

Fastening And Clamping Wood Tools
This type of woodshop tool is used to make your woodwork project stays together, whether temporarily or permanently. Fasteners are used to permanently connect a woodworker’s work, like wooden cabinets, furniture, cupboard, chest drawers, and dresser.
On the other hand, a clamp tool is used to bind wood boards temporarily. For instance, a clamp tool is used to clamp two boards together until its wood glue dries up.
The fastening and clamping tool includes nails, screws, wood glue, parallel clamps, F-Style pipe clamp, C-Style ratcheting clamp, spring clamps, workbench clamp, and edge clamp.
Measuring And Marking Tools
Wood marking and measuring require preciseness and accuracy. With the right marking and measuring tools, you can improve your precision. What are the measuring tools you need for woodworking?
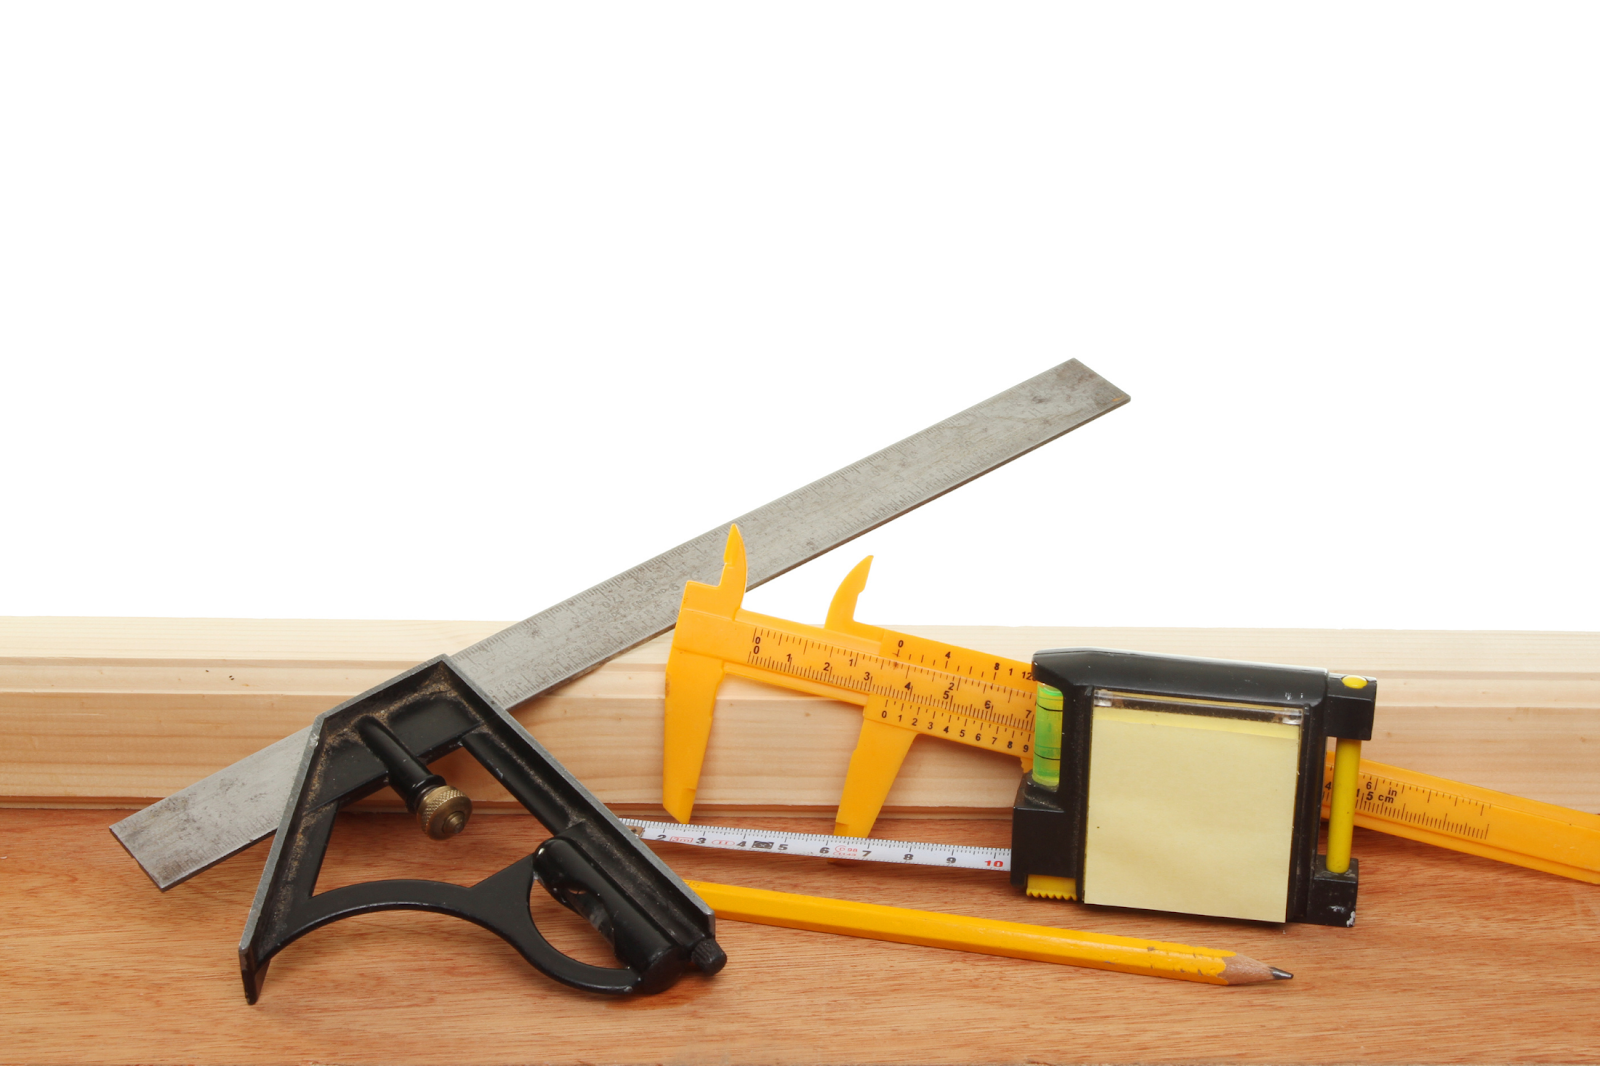
Measuring and marking tools include square, sliding T-Bevel, compass, marking gauge, mortise, winding sticks, panel gauge, caliper, protractor, and feeler gauge.
Mallets And Hammers
Mallets and hammers are some of the most common tools available in our houses. They are a versatile tool that is essential for any DIY and house repair.
In a woodshop, the mallet is a type of hammer designed to chisel in chopping mortise and cutting dovetails. As it has less impact on your board surface than with the hammer that is made from metal.
Another type of hammer is the Claw Hammer that comes with a steelhead and a wooden hammer body. It is designed to pull nails or pound nails into the wood or even on your concrete walls. Almost everyone has a hammer kept on their house just if they needed it for their house repair or any projects that require pounding.
It is one of the small tools that a woodworker needs for his woodshop shed. It is essential for any woodwork projects. Where can you place your hammer and mallets? You can organize it on your pegboard built on your wall space.
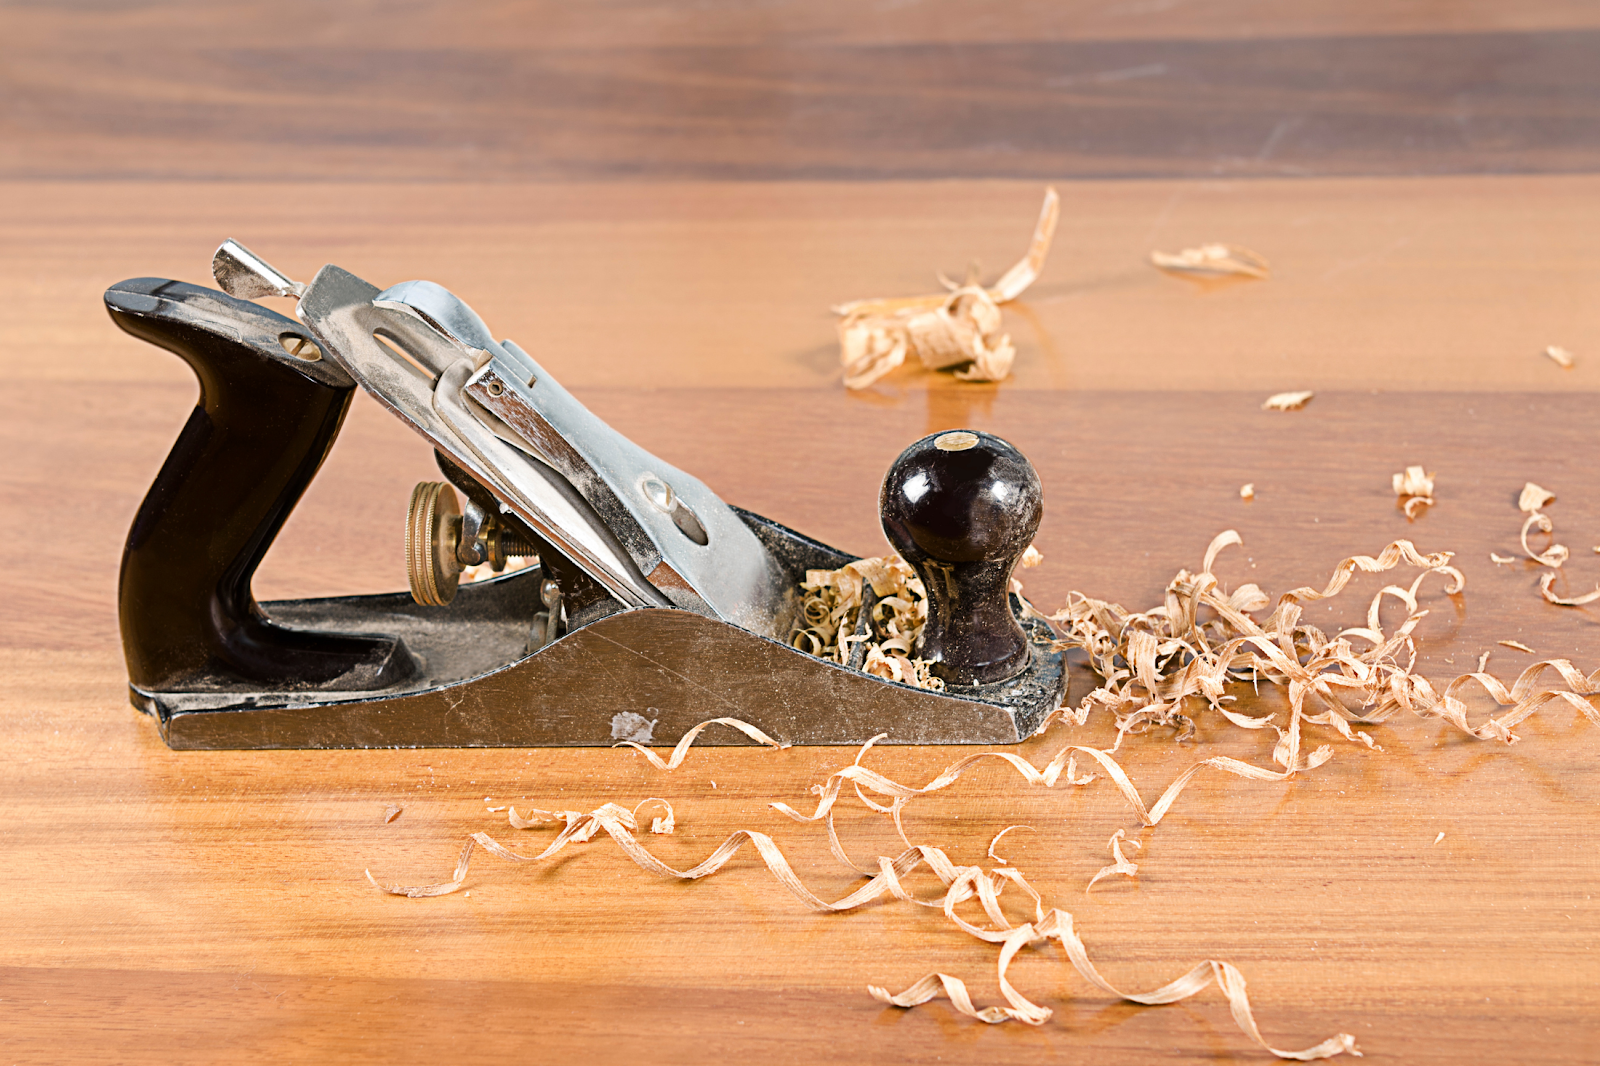
Hand Planes
A hand plane is commonly used for wood shaping, wood flattening, reducing wood thickness, and making a lumber’s smooth surface. You can keep this tool organized under your working bench storage cabinet. You can use your shelving storage too to keep these planes organized.

If you decide to create a backyard woodworking shop at the back of your house, make sure to have proper planning, an appropriate layout of the woodshop, and dimension. Moreover, don’t forget to secure the necessary papers for your woodshop to avoid future problems.
Whether it’s a small ranch-style or a large concrete barn house style projects, it is up to you to decide. As long as you are comfortable with your woodshop work area and it is cost-efficient for you, it is great.
Customize your woodshop shed with your work surfaces and storage unit to suit often the projects you take on in your woodshop. Then, don’t forget to organize your tools in an accessible-height for you to access when you need them without interrupting your work easily.